I recently decided to implement SSL/HTTPS on my blog here at www.perfectcloud.org.
The main reasons for the decision are:
#1 Google is no longer sending me any referer information from their HTTPS websites.
#2 Google decided to improve ranking of websites on HTTPS compared with HTTP websites.
Items on my to-do list for making this happen were:
#1 Validate if my current webhost supports SSL (if yes, enable it)
#2 Obtain SSL certificate
#3 Implement SSL certificate
#4 Validate implementation of SSL certificate
Let’s walk through the steps:
#1 Validate if my current webhost supports SSL (if yes, enable it)
My blog is currently hosted by UnoEuro and has been with them since 2012. They support SSL/HTTPS using Server Name Indication (SNI).
They charge a small fee per month for having it enabled, but seeing as it will cause additional load on their servers I don’t see any problem with that.
#2 Obtain SSL certificate
Next up was deciding on where to get/buy the actual certificate from. Overall you will have two options: Free or Paid.
The only free, public trusted, CA I could find was StartSSL. I do not have any personal experience with them though.
I handle most of my domains through NameCheap and noticed they also own SSLs.com. I did some digging on Google and found positive reviews.
I had a few questions for SSLs.com on their online chat and they responded both quick and professional.
Basically their website is a market and I decided on the PositiveSSL which is just under $5/year… at that price I might as well get 3 years up front 🙂
A good thing about PositiveSSL is it covers both domain.com and www.domain.com at no additional cost.
I could not find a Certificate Signing Request generator on the UnoEuro website, but I managed to find a web based tool. Here is a sample of my input:
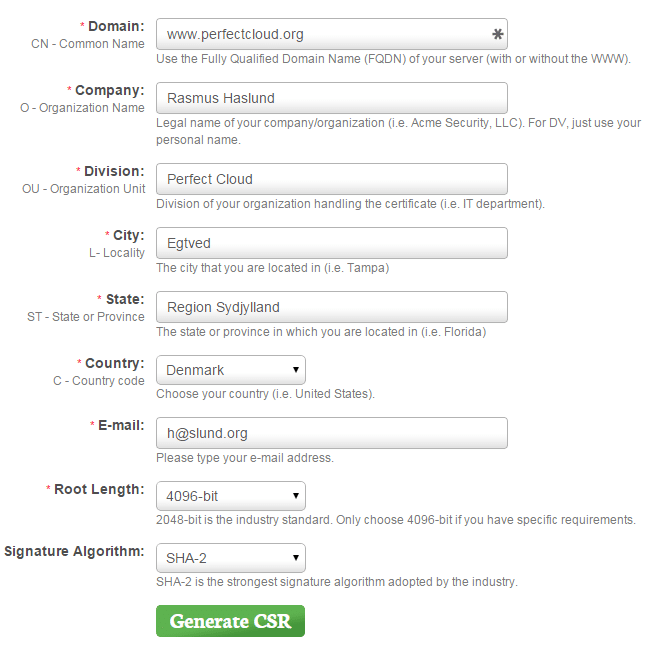
This will out put a CSR file and the corresponding private key.
I then uploaded the CSR to SSLs.com. Make sure you save the private key a safe place, you will need it for step 3!
#3 Implement SSL certificate
Once SSLs.com issued the certificate I needed three files to implement the certificate:
#1 Certificate file – .CRT (issued by SSLs.com)
#2 Private key – .KEY (created by the CSR generator in step 2, remember I told you to save the file)
#3 CA certificate chain – .CRT (Provided by SSLs.com)
Once all three files were uploaded to UnoEuro under SSL certificates, I simply went to their control panel and selected the newly imported certificate for use with my domain.
I think there was a 5-10 minute delay before it actually worked, but could also just have been my browser messing with me.
The first thing I noticed was Google Chrome complained:
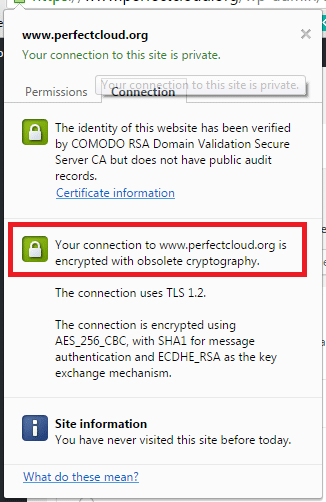
It seemed like the certificate was working, but perhaps not ideally!
After the changes implemented in step #4 the result was:
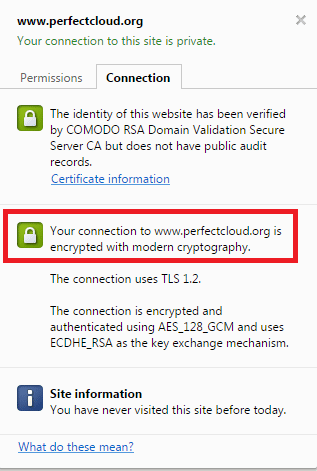
On to step #4.
#4 Validate implementation of SSL certificate
A quick Google search brought up two useful tools:
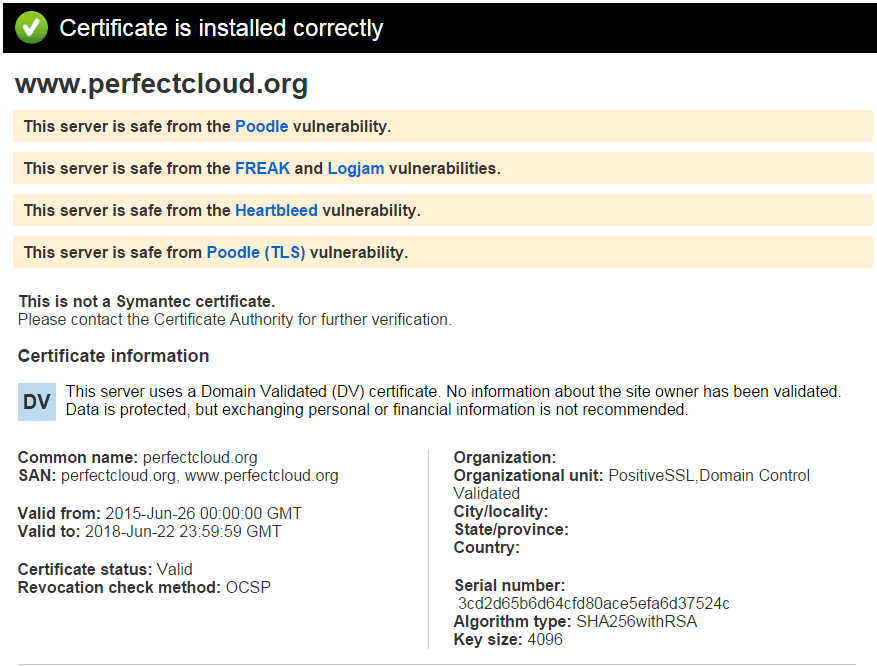
First I gave Symantec SSL Toolbox a try:
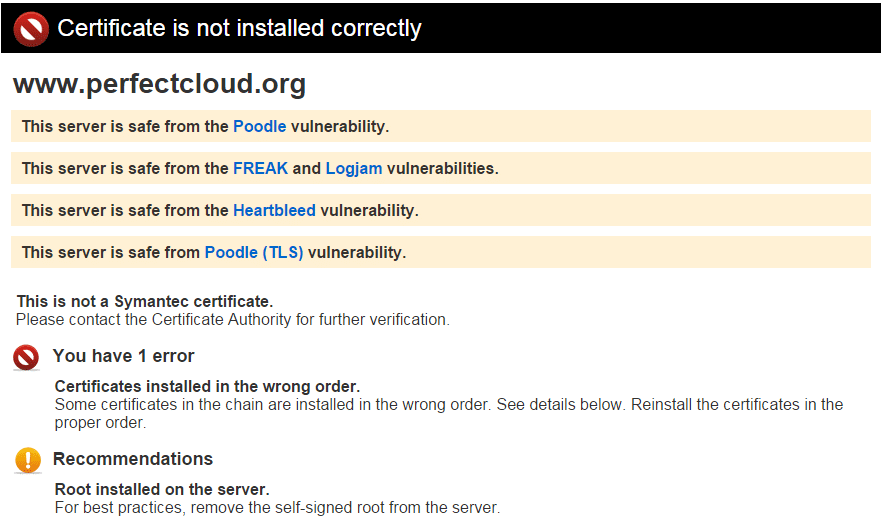
One error and one recommendation, aha!
Both issues originated from the CA Certificate Chain provided by SSLs.com.
The file included the Root CA and now I had to figure out which of the three chain certificates inside was the root CA..
Fortunately I found an easy to use online certificate decoder tool and tried them one at a time until:
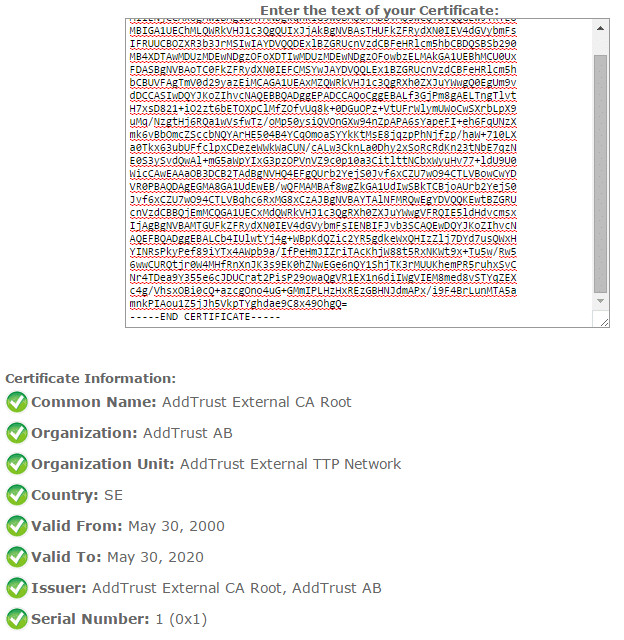
After removing the Root CA from the bundle file and replacing the chain CRT file at UnoEuro, Symantec was happy:
Next up the Qualys SSL Labs tool!
Unfortunately I did not take a screenshot of the initial scores 🙁
These are the end results and I will explain how I got there:
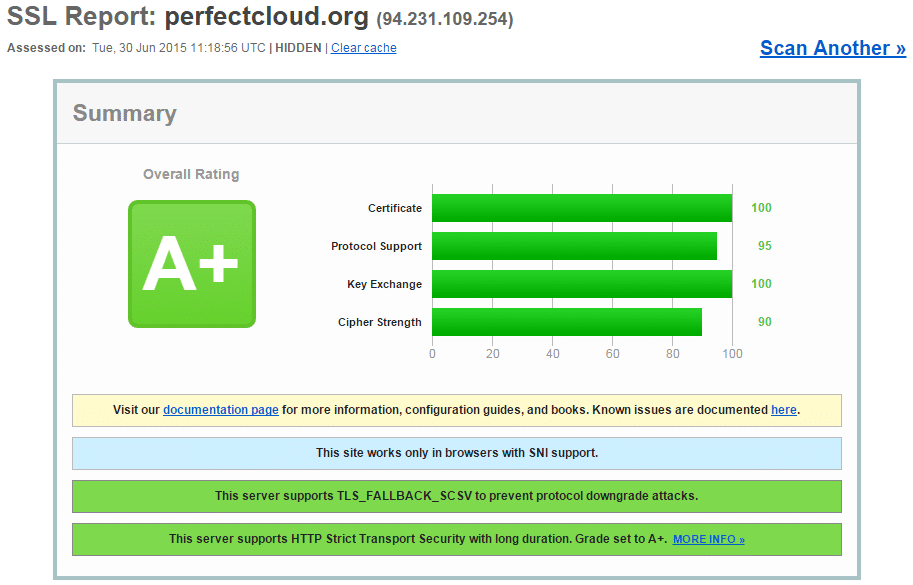
Initially I did not have “HTTP Strict Transport Security” enabled, but found out this could be enabled using .htaccess by adding:
Header set Strict-Transport-Security “max-age=31536000” env=HTTPS
Adding this changed my overall rating from A to A+
For the actual scores 100/95/100/90 it was a bit more tricky.
I soon discovered SSLCipherSuite directive which I could too control using .htaccess file.
After much tweaking I have ended up with:
SSLCipherSuite “EECDH+ECDSA+AESGCM EECDH+aRSA+AESGCM EECDH+ECDSA+SHA384 EECDH+ECDSA+SHA256 EECDH+aRSA+SHA384 EECDH+aRSA+SHA256 EECDH EDH+aRSA !aNULL !eNULL !LOW !3DES !MD5 !EXP !PSK !SRP !DSS !RC4”
I am sure this can be improved further upon, please do leave feedback in the comments if you have any ideas.
The last item was the certificate it self. In the above steps I had it issued as 4096 bit, but originally I had it issued as 2048 bit.
Thankfully SSLs.com offers FREE re-issue of certificates so the only process here was to create a new CSR and mark the request as 4096 bit.
Final thoughts
Thank you for reading through this rather long blog post.
If any of the information was of use to you, please do leave a comment.
Hi Ramus,
there’s a cool Mozilla project to make SSL available for everyone – for free:
https://letsencrypt.org/